I have been really into colorful raffia lately! It looks great in so many DIY projects, like the “Raffia Fringe Bag.”
You will love to make this high-end style basket for your home.
I know some people are intimidated when you use the word embroider. But, this is so darn easy!
And this Seagrass Basket and the colorful raffia make it look like a high end purchase from Anthropologie.
(If you work better with a step-by-step video you can scroll to the bottom this post.)
Supplies:
- + Sea Grass Basket
- + Assorted Raffia
- + Large Eye Needles
- +Gold Scissors (My favorite Scissors!!!)
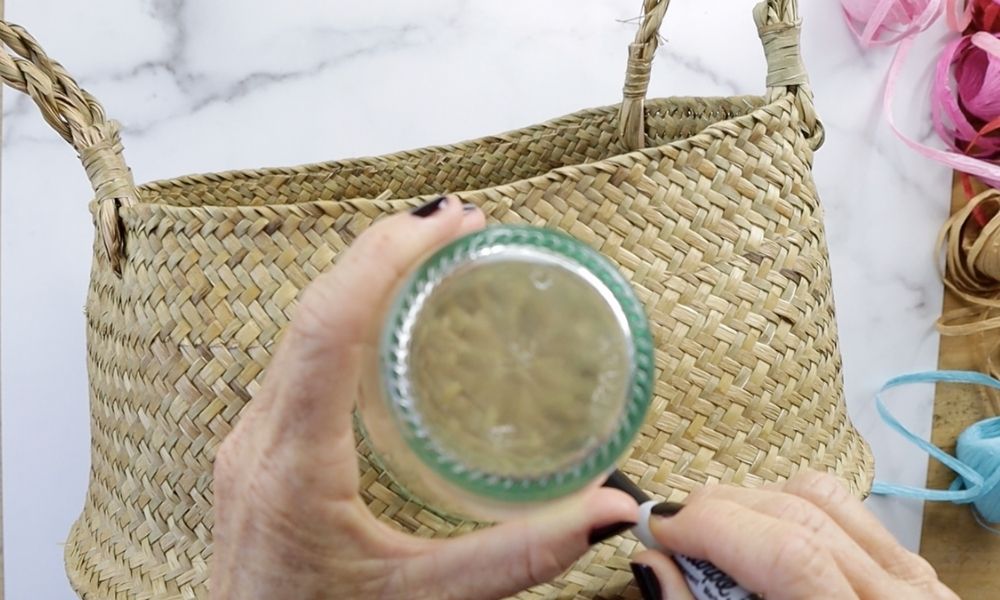
Trace 3 circle across the top of your basket.
I used a glass as a template…with “1” large circle in the middle.
Then I flipped the cup to make “2” small circles on each side.
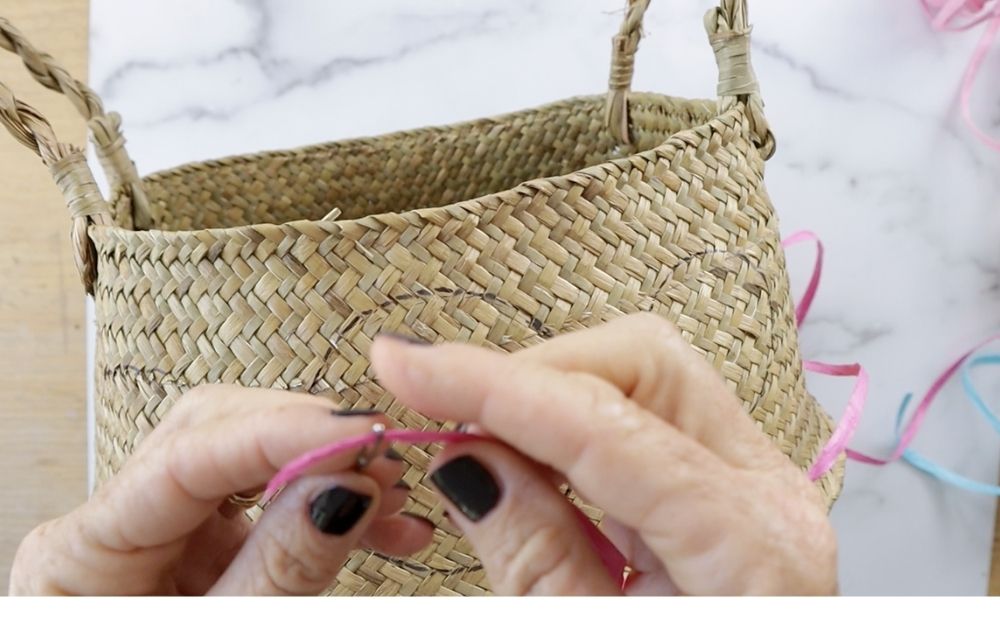
Thread your large needle with raffia with a knot at the other end.

Push through the center of the circle until the knotted end hits the back of the basket.
Now take your needle and push through the outer edge of your circle.
Now repeat the steps….
Push needle through center and then to outer edge of circle.
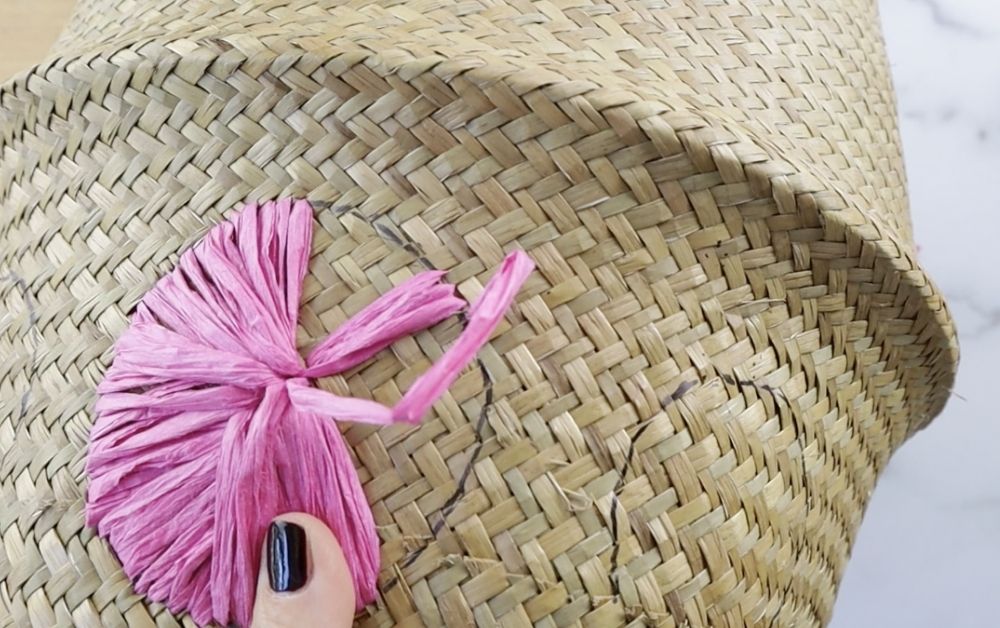
Keeping repeating the steps until you cover the entire circle.
…notice how I didn’t always go straight through center. I kinda went next to the center at different times.

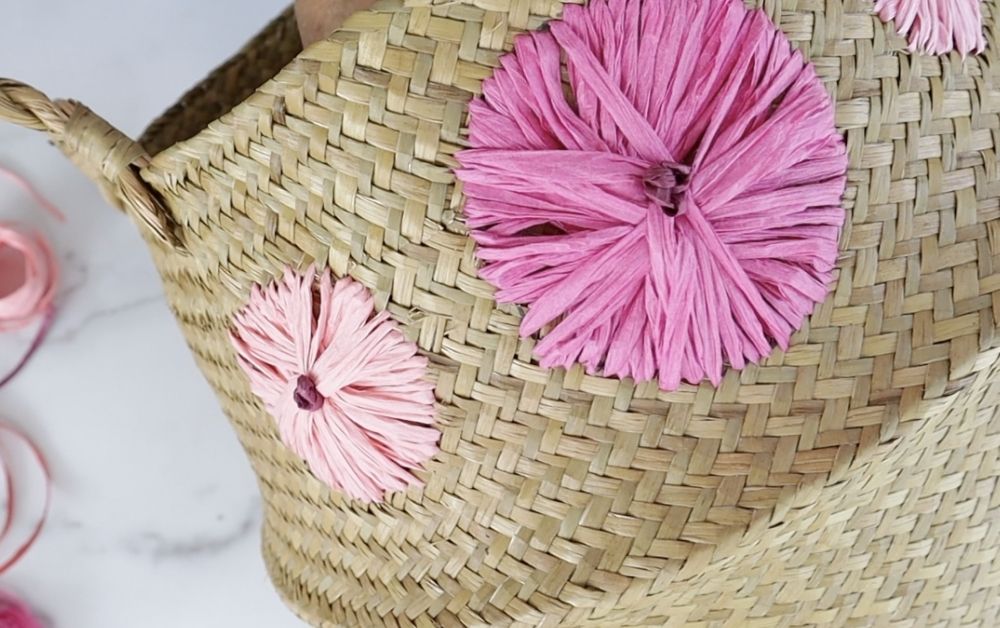
Viola….Look how adorable this looks already!
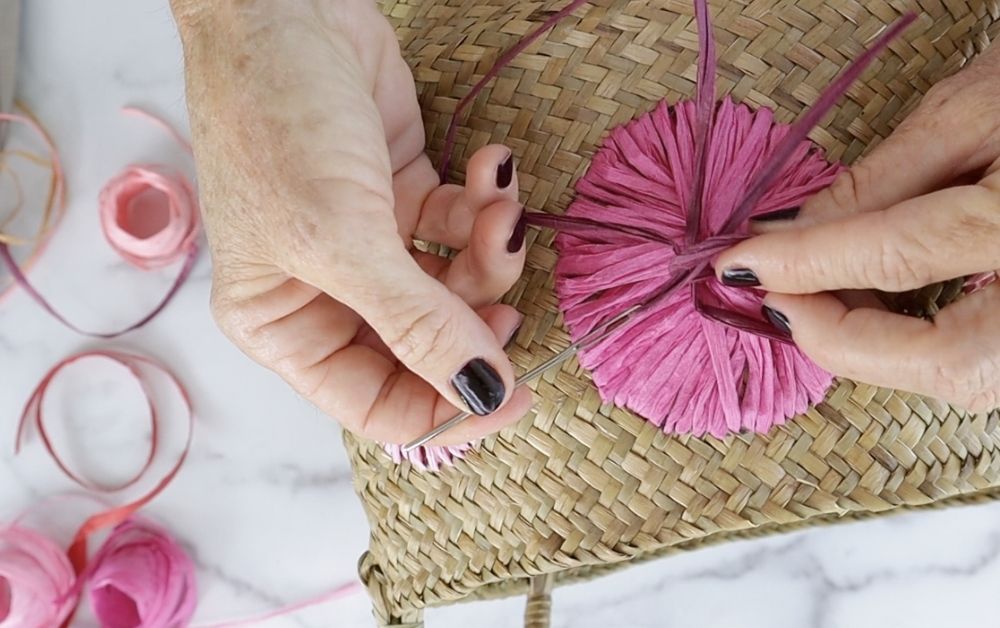
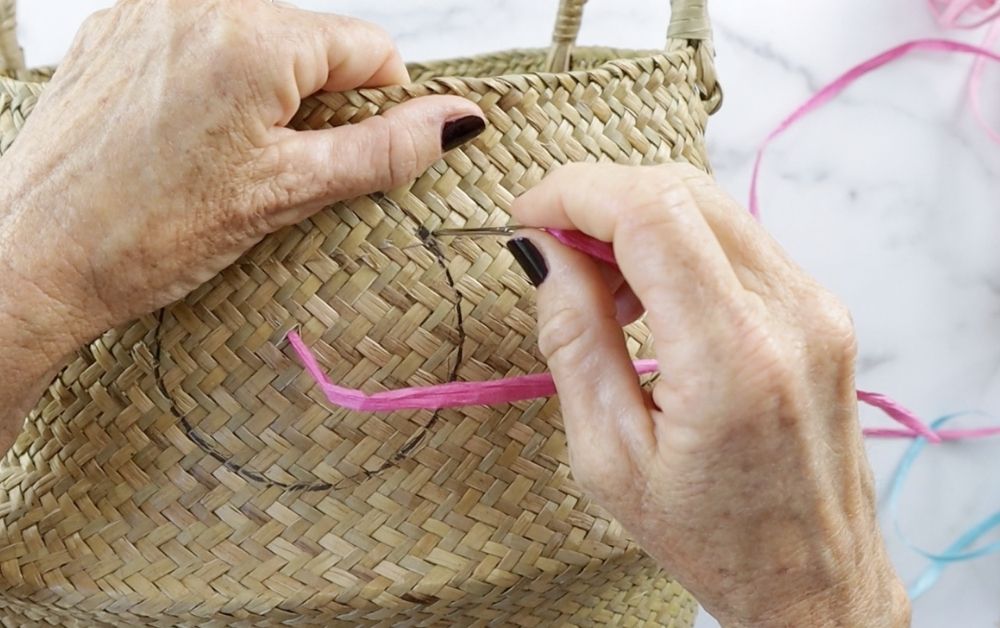
Next, take a different color raffia and pull through the back taught.
Then, make a loss knot and slide it to the center of the circle.
(If you need extra help to understand this part you can always watch the video below.)
Make a knot in the center of each circle.
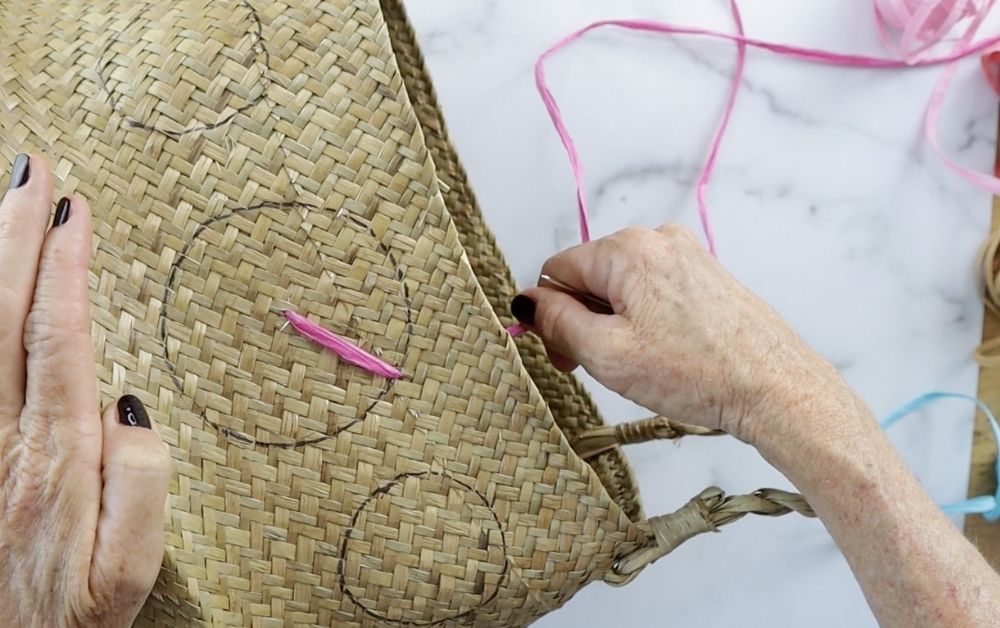
Of course I can’t just have the three flower patterns. I need more!
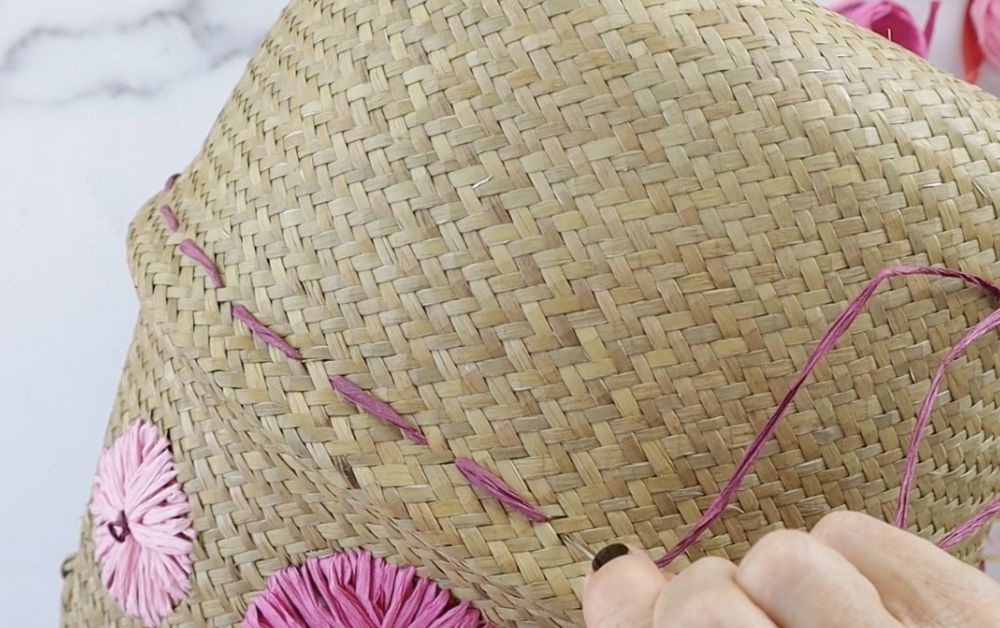
So, I added a running stitch along the center.
A running stitch is really easy. You take your needle from the back and just go in and out all the way around the basket.
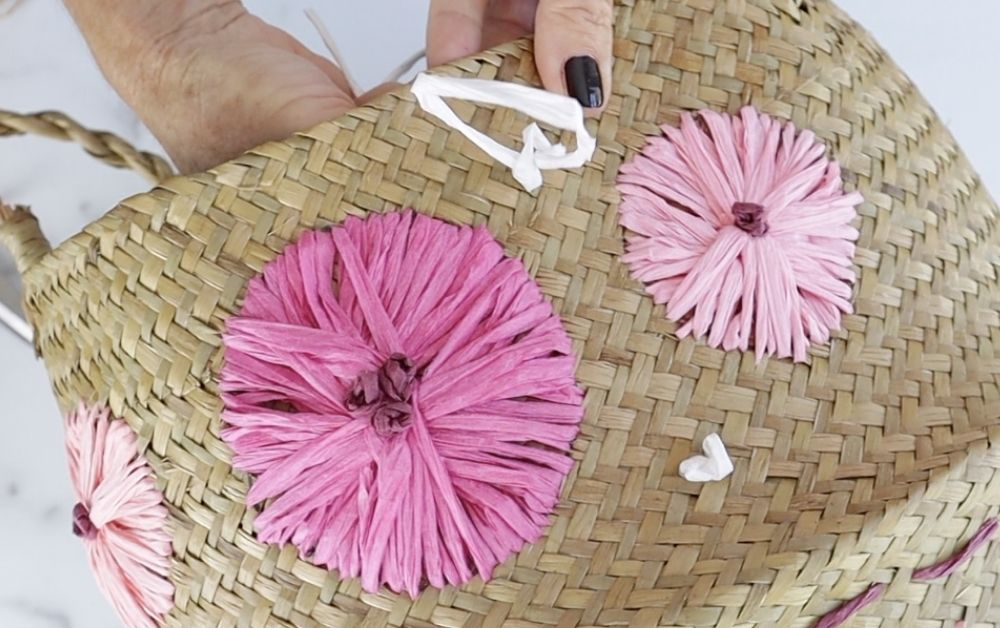
I added more knots, in white raffia, all over the top of the basket.
Doesn’t it look so cute?!
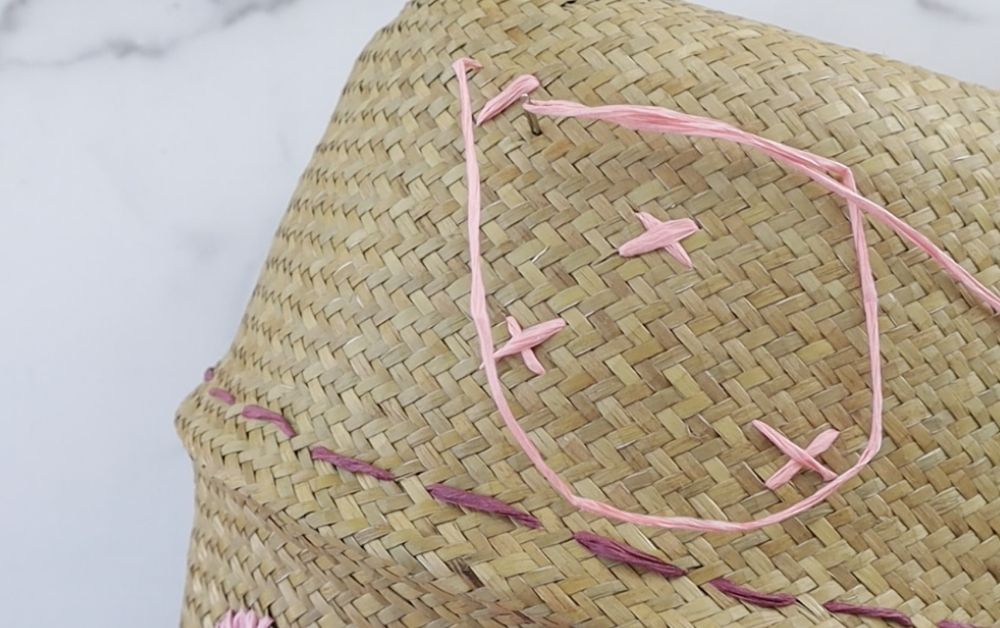
And if that wasn’t already cute…you can add “Xs” all over the bottom.
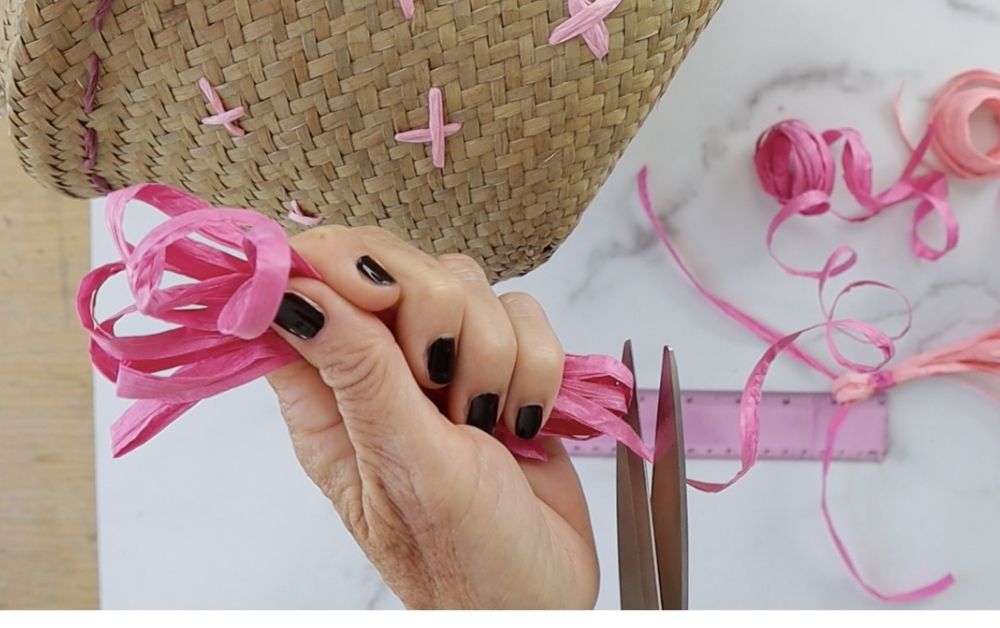
Now for the icing on the raffia basket cake……tassels!
Measure your raffia at about 5″ and wrap it back and firth until you have about 10 layers.

Next, take a 7″ strip of raffia and loop it through all the loops.
Then take another strip of raffia, in another color, and wrap it around all the raffia…about 1″ below the top.
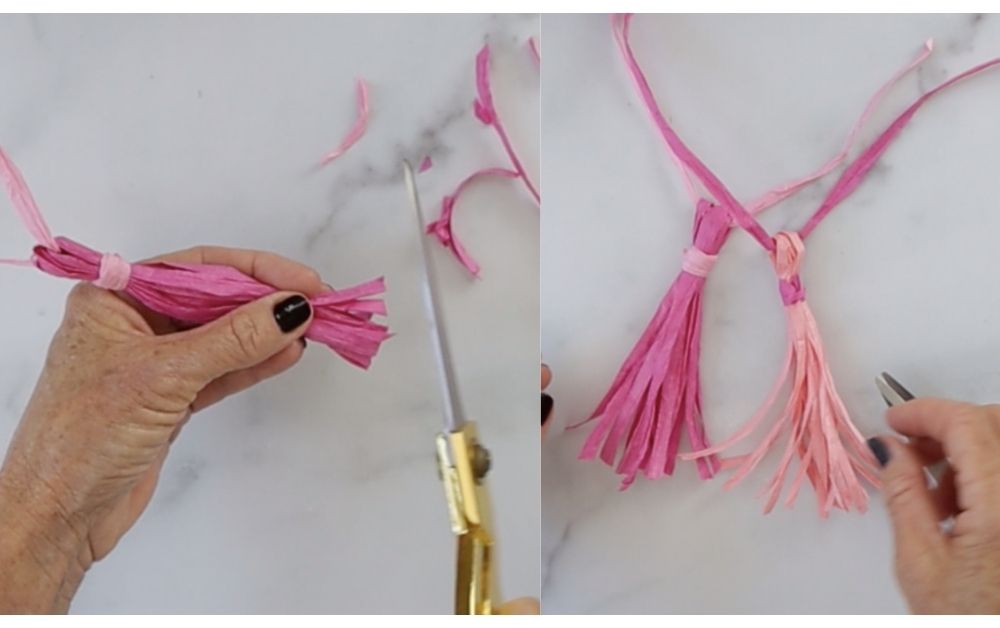
Trim the ends.
And your done.
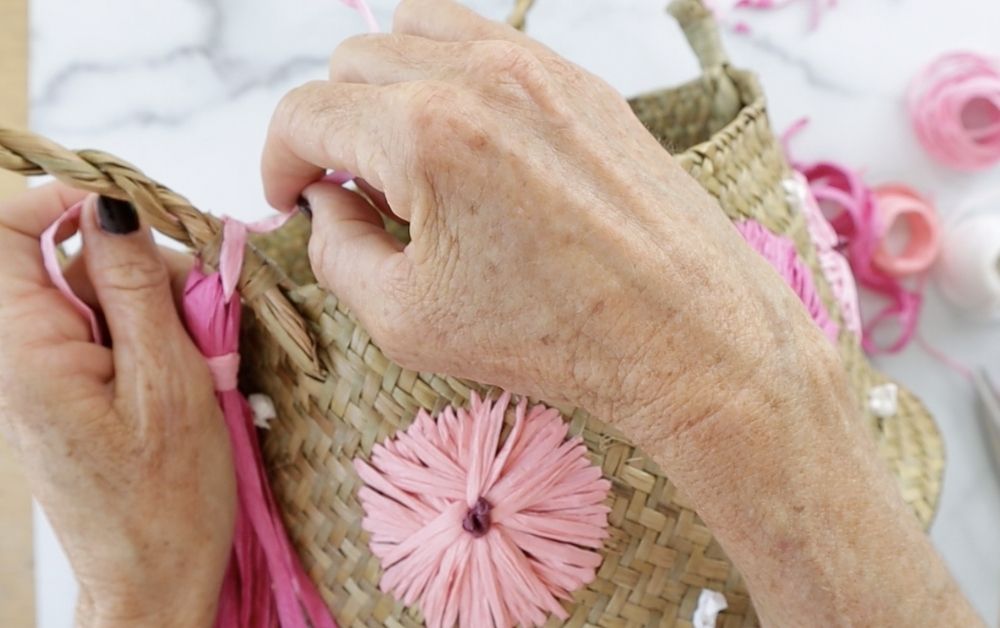
Now add them to the basket handles for an added touch.
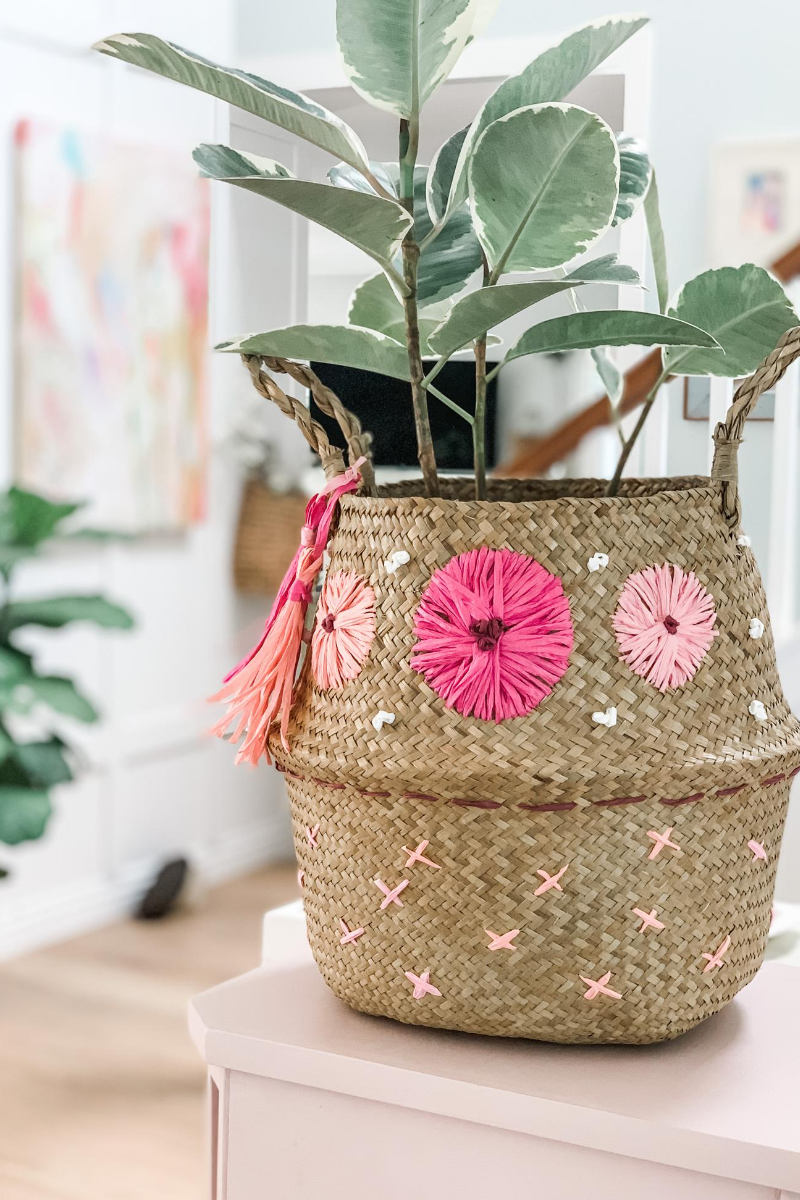
How beautiful is this basket?
Move over Anthropologie!
Need more? I have another raffia project that you will looooooove!!!!
“Pin Me” to you Favorite DIY Pinterest Board!
This DIY Project is so easy and the video tutorial is so easy to follow.
I can’t wait to hear what everyone thinks of this project!
Be sure to let me know if you tried it and “Pin it” to your favorite DIY Board.
Have an awesome day DIYing everyone!


I am in love with this! I just have to make one for my house. Thanks for sharing your creativity with us, God bless you!
Author
Hi Susan: So glad you liked my DIY! And thank you for the sweet comment! 🙂