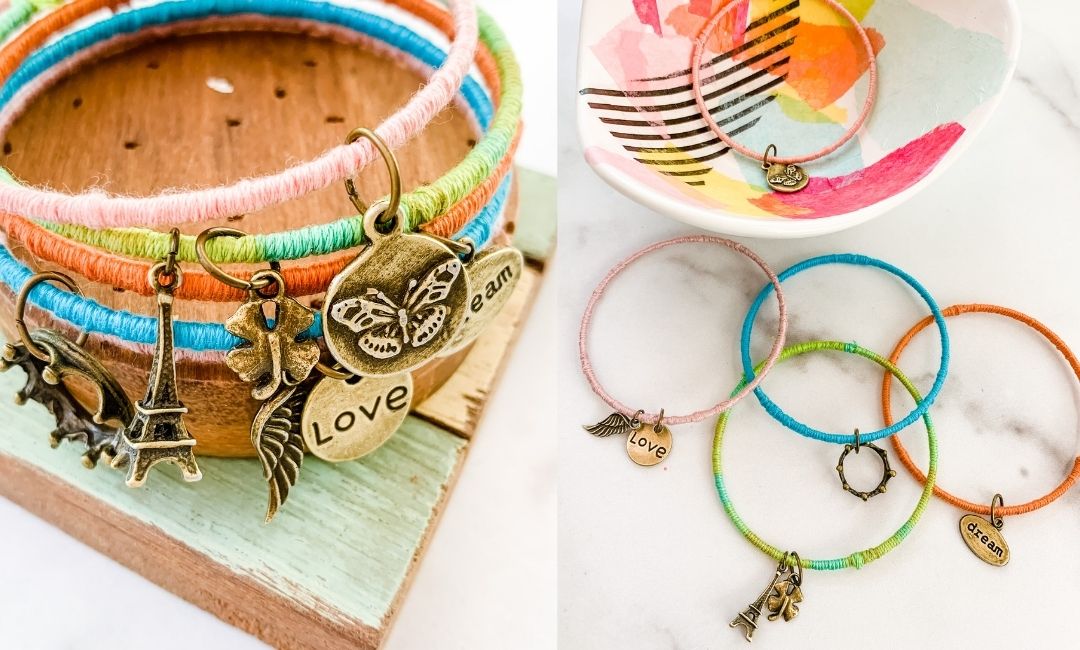
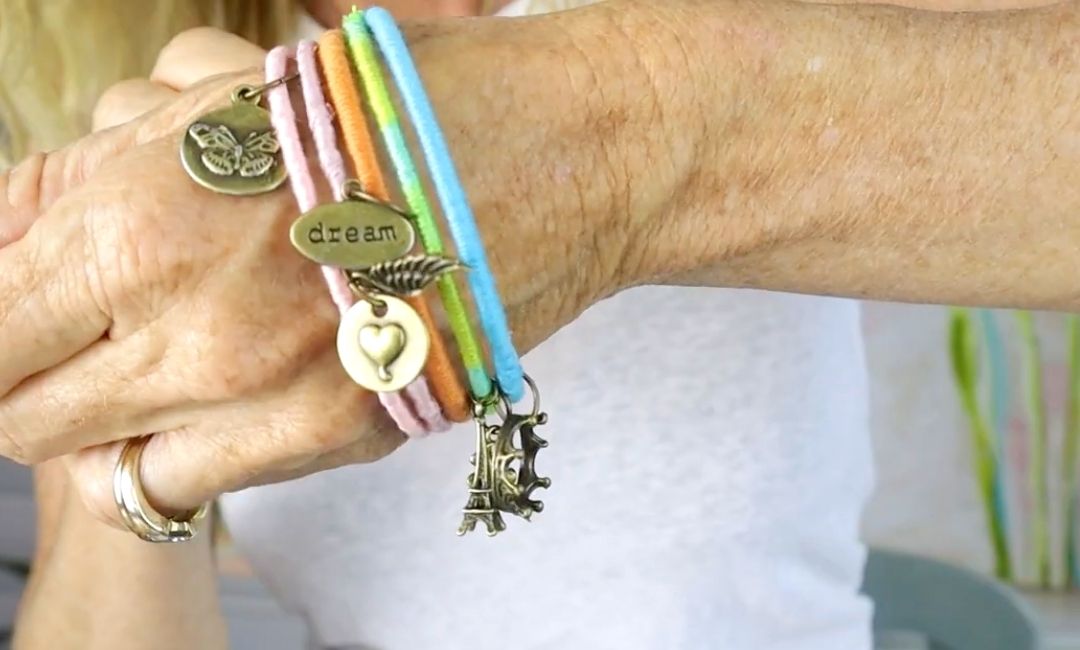
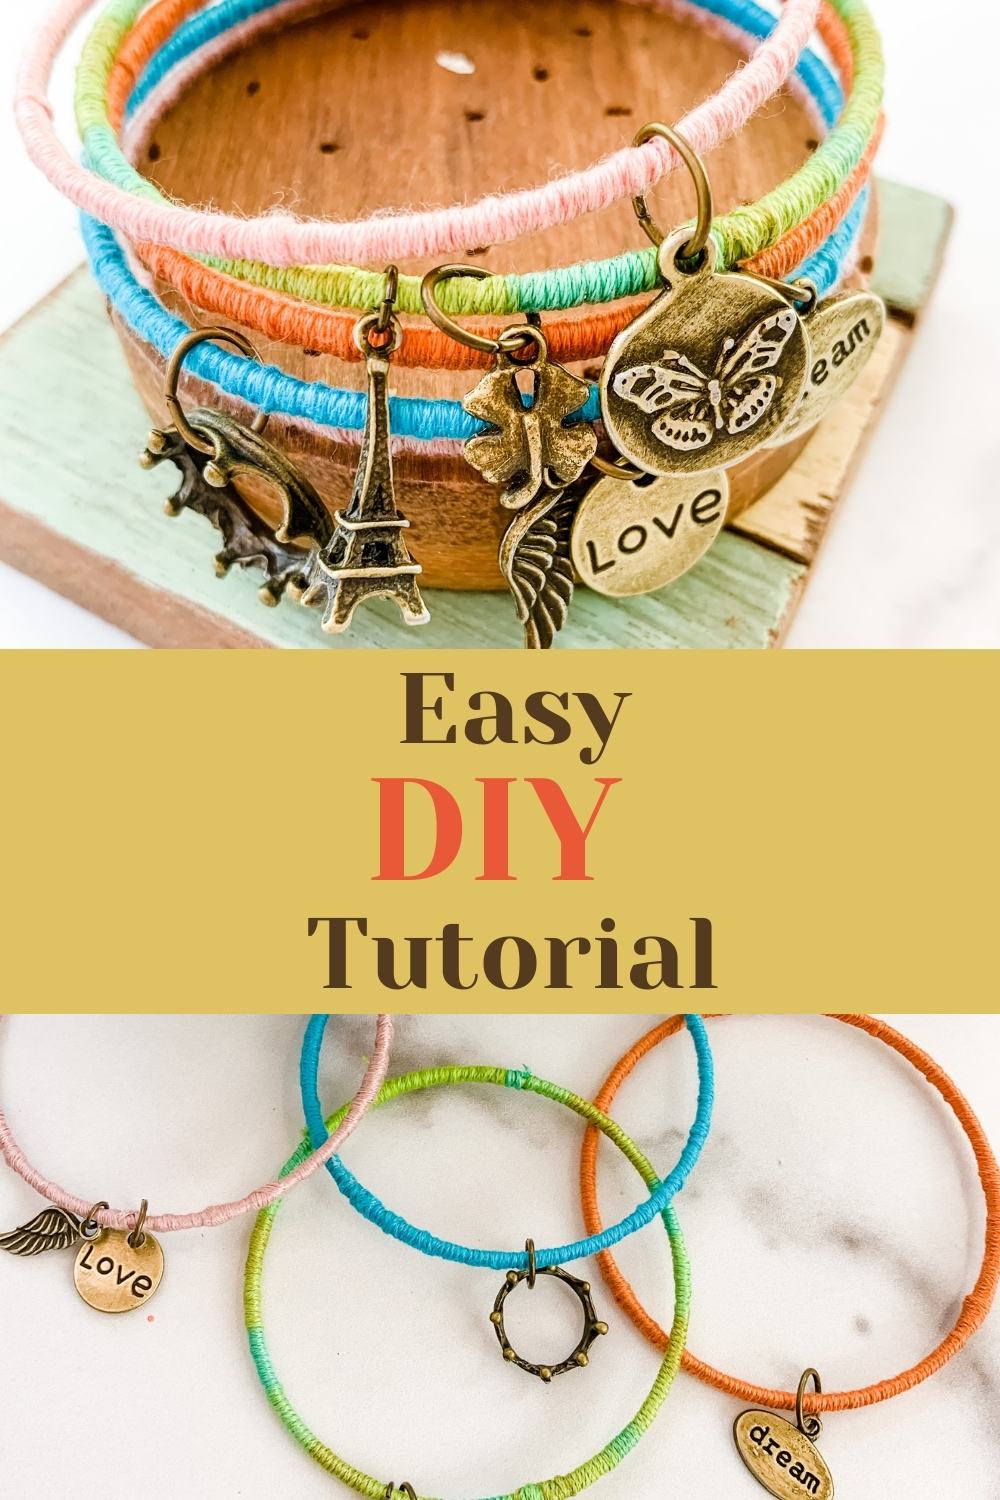
Who wants to a string bracelet DIY using embroidery floss? These wrapped bracelets are so fun and easy to make. …and you only need a few supplies to get started.
You only need a few supplies for your String Bracelets DIY.
Before I forget…
Do you like to watch “Video Tutorials” to learn?
Then scroll to the bottom to watch a full video tutorial.
Ok….
Let’s grab some glue, some bracelets, embroidery floss, and some charms and have some fun!
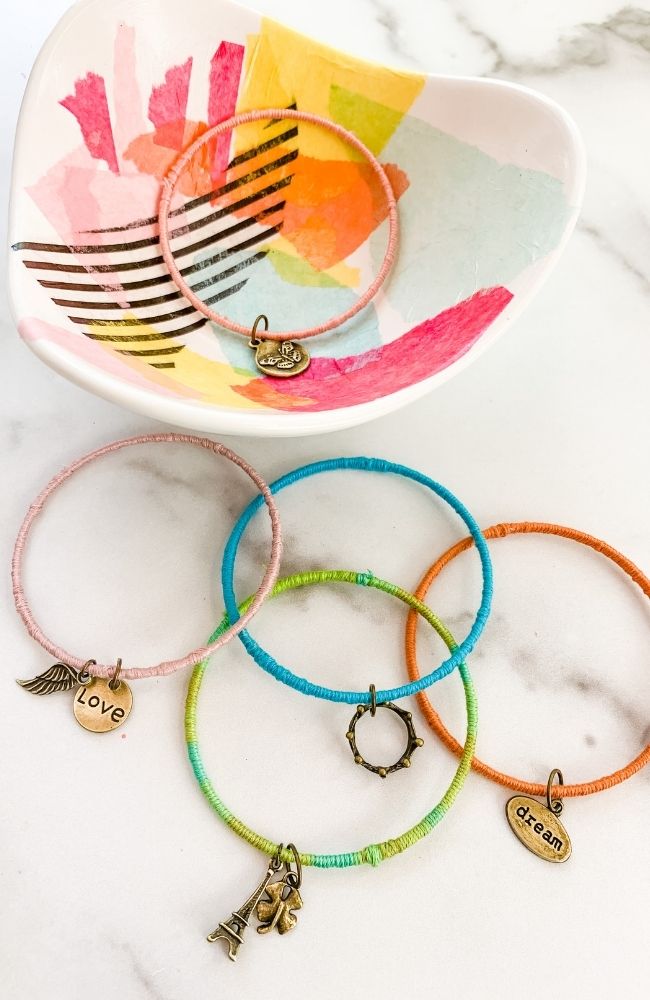
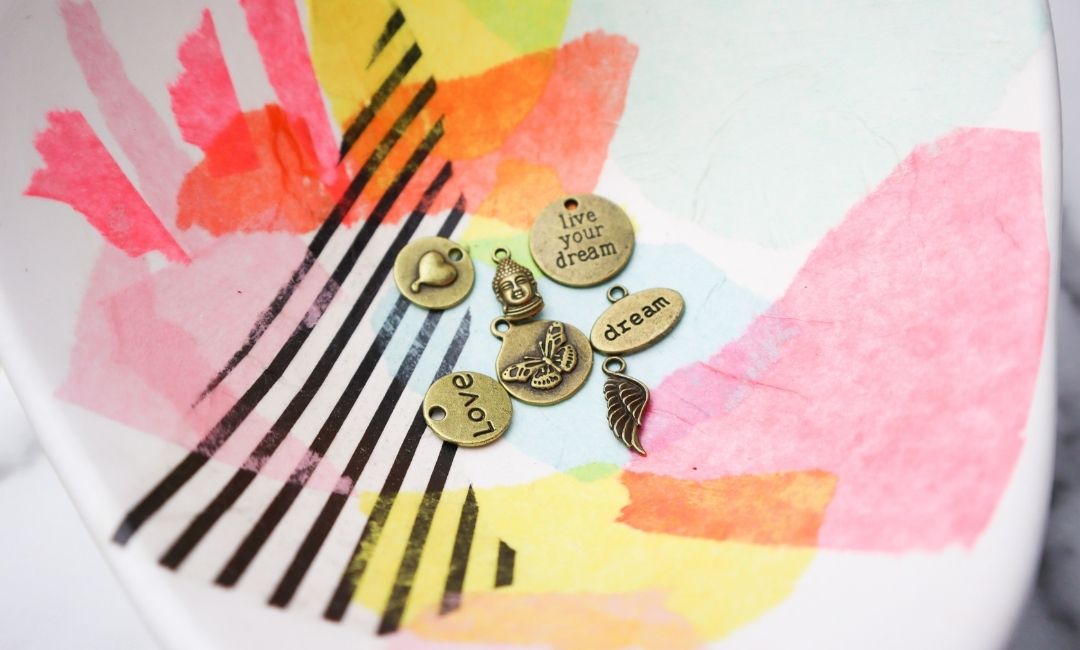
After you make your jewelry you can make this DIY jewelry bowl to hold everything. It’s made using tissue paper.
It’s a great DIY Jewelry Project for teenagers too.
Let’s get started making your easy string bracelets…
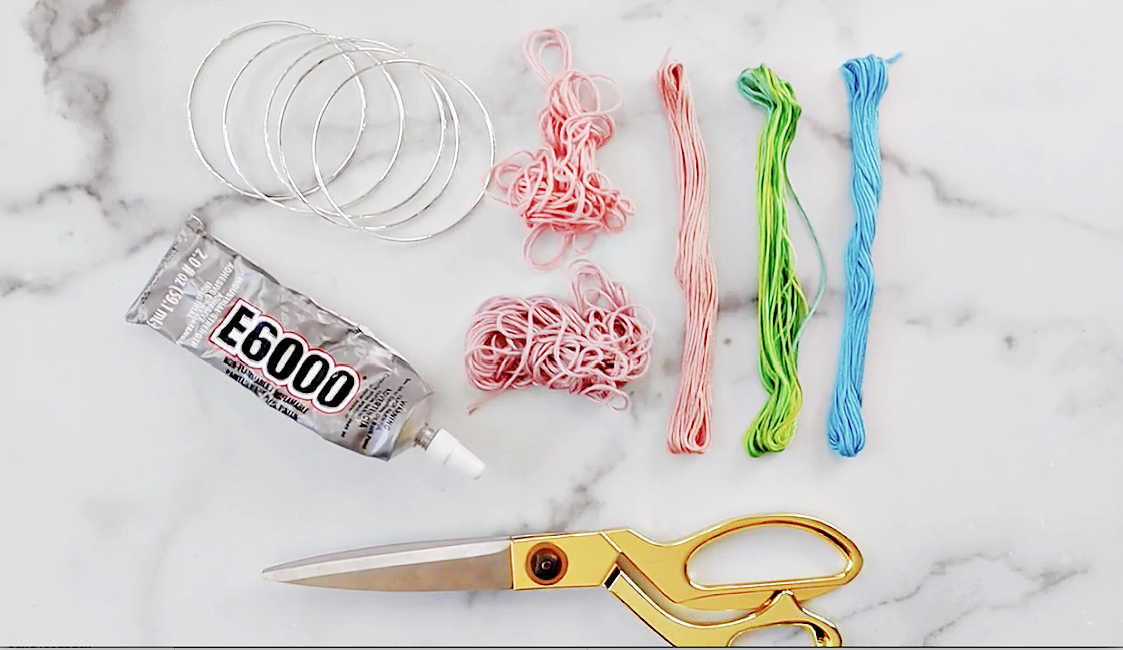
Supplies to Make Your DIY Bracelets:
- Cute set of Bangle Bracelets to use as your base.
- A great set of Jewelry Pliers
- Gold Plated Round Jump Rings Set
- Assorted Gold & Silver Jump Ring Set
- Assorted Embroidery Floss in an array of different colors to use with so many projects.
- Gold Scissors (My Fav!!!)
- E600 Glue (you will use this glue with everything!!!)
- I love this assortment of 48 antique brass charms with motivational quotes.
- This 100 piece charm collection has everything from hearts with wings, starfish, to skulls. It’s a great charm collection to use in tons of jewelry projects.
You may be able to find some embroidery floss and bangle bracelets at the dollar store too!
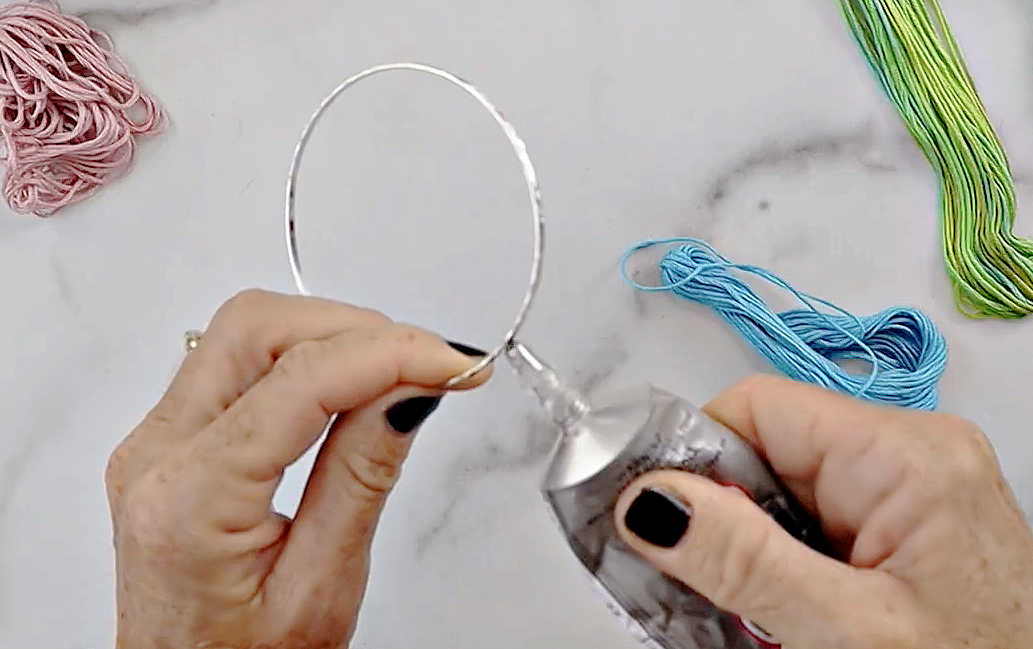
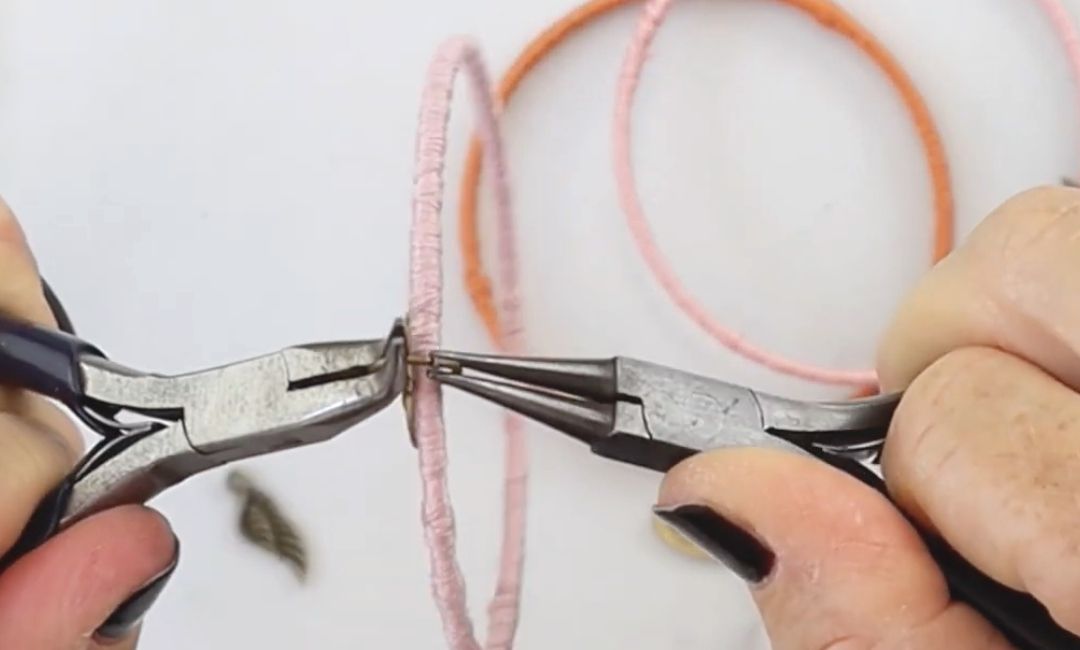
Step 1: First, add a dot of glue to your bracelet.
Step 2: Next, attach one end of you embroidery floss to the dot of glue.
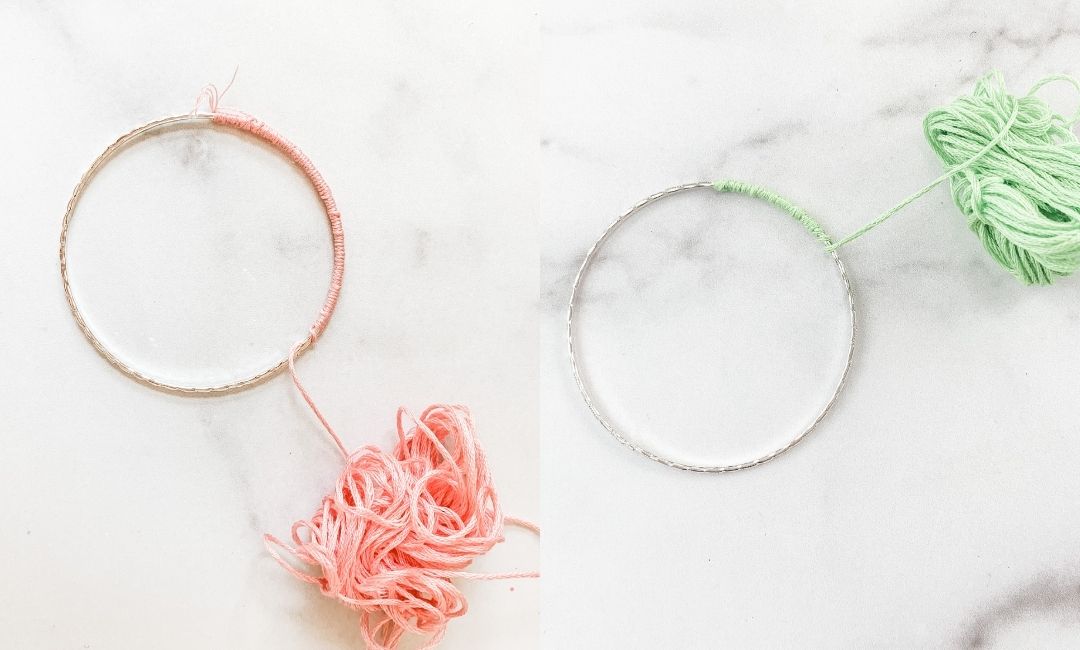
Step 3: Start to wrap each bracelet with your embroidery floss.
You can also alternate colors to make a striped effect that would look super cute!
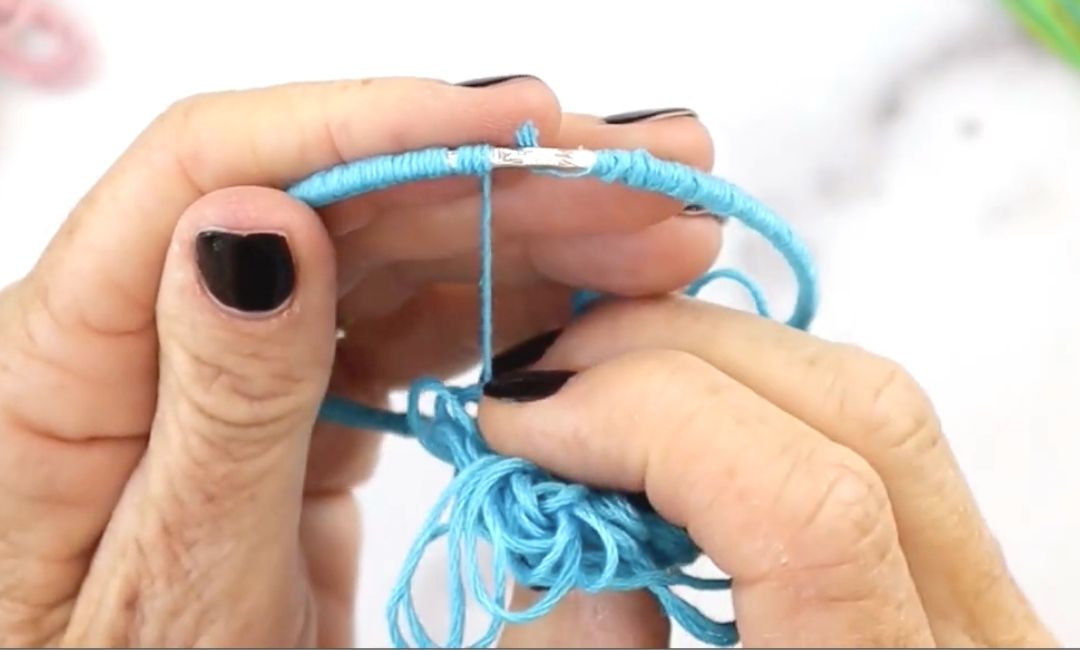
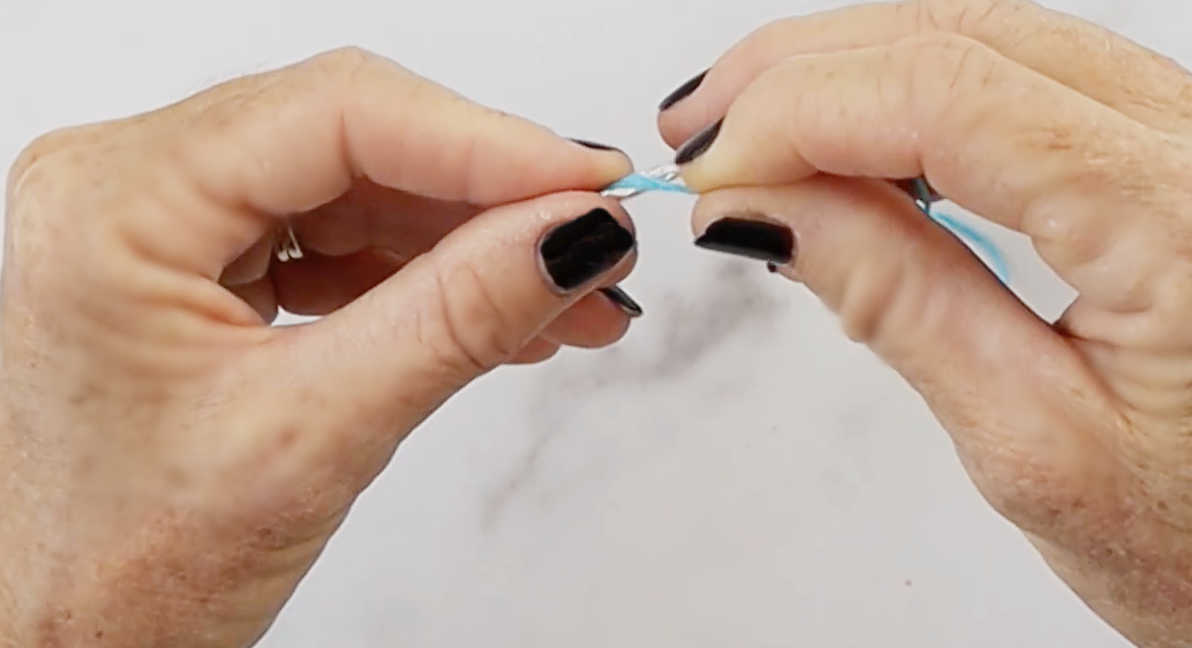
Step 4: Now, wrap your thread tightly around your bracelet until you are almost all the way around the bracelet.
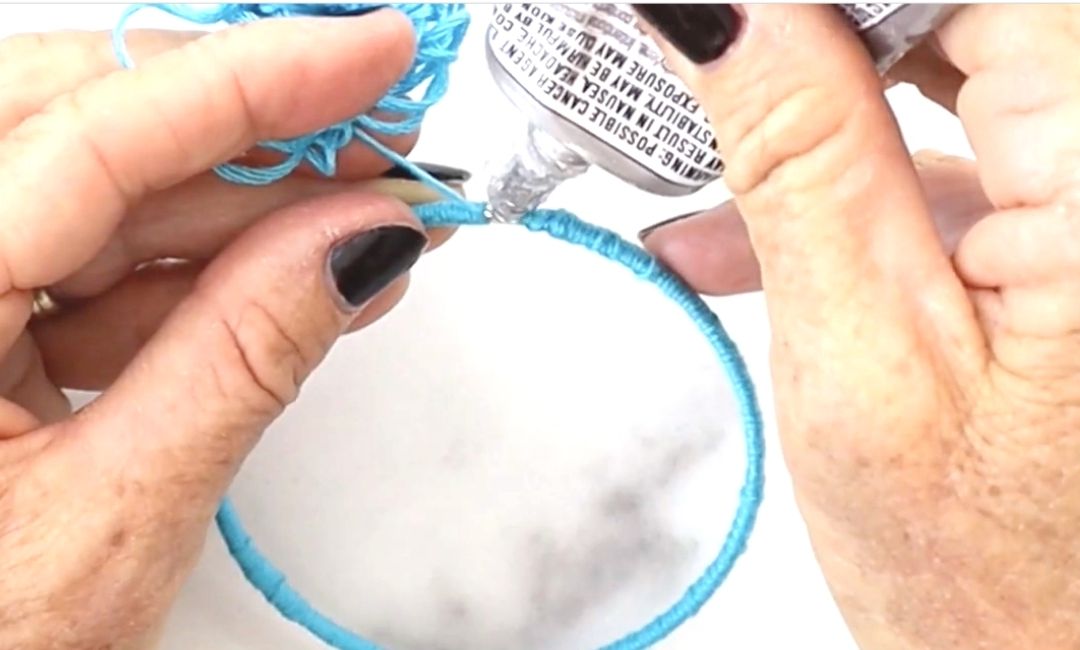
When you get to the end add another dot of glue.
Then tightly wrap the embroidery floss until you cover the entire bracelet.
Now it’s time to add some cute charms.
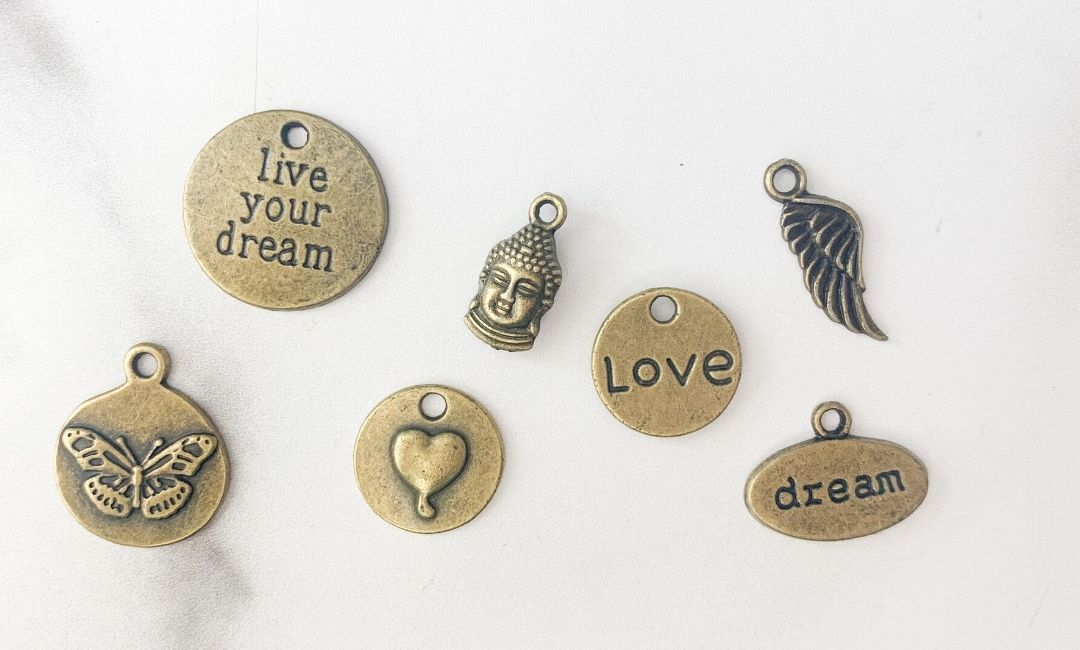
There really are so many charm choices. I love these affirmation charms.
You may not know this…
But, I’m a Jewelry Designer!!! I semi-retired about 8 years ago. You can read my story here.
My jewelry was a regular on “Friends” and “90210” back in the day, LOL!
Who’s a fan of “Friends?”
Ok, back to our Bracelet DIY tutorial…
Step 5: Adding Charms to Your Bracelet DIY
Now you can add a cute charm or two….or three! It’s your design so be as creative as you want!!!
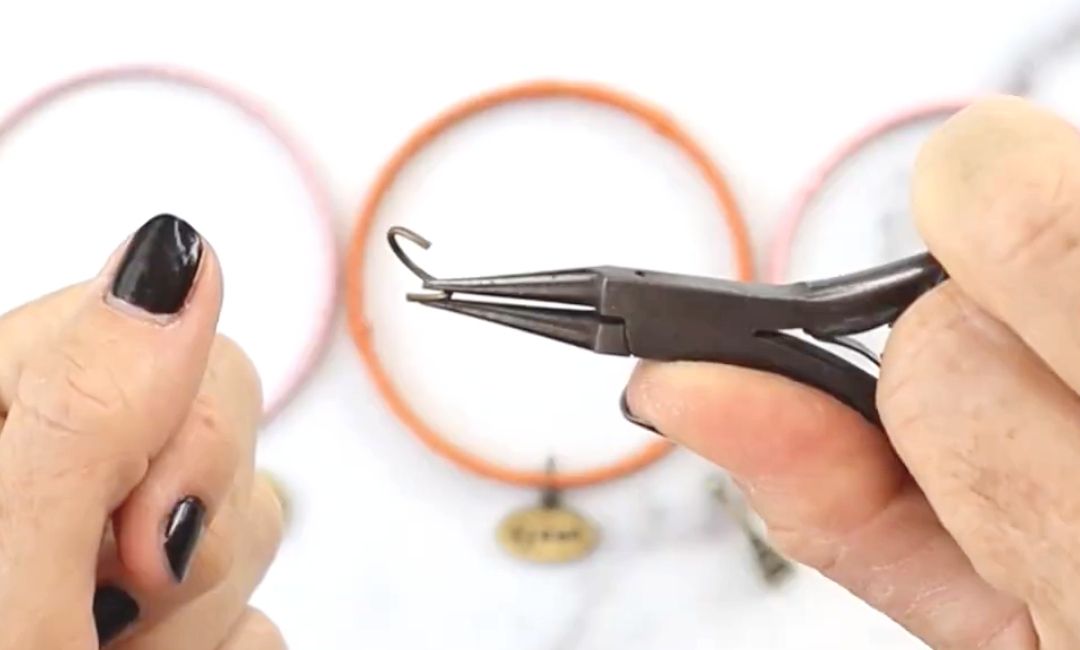
Open your large jump ring.
Make sure to open your jump ring side to side, as shown in the photo above.
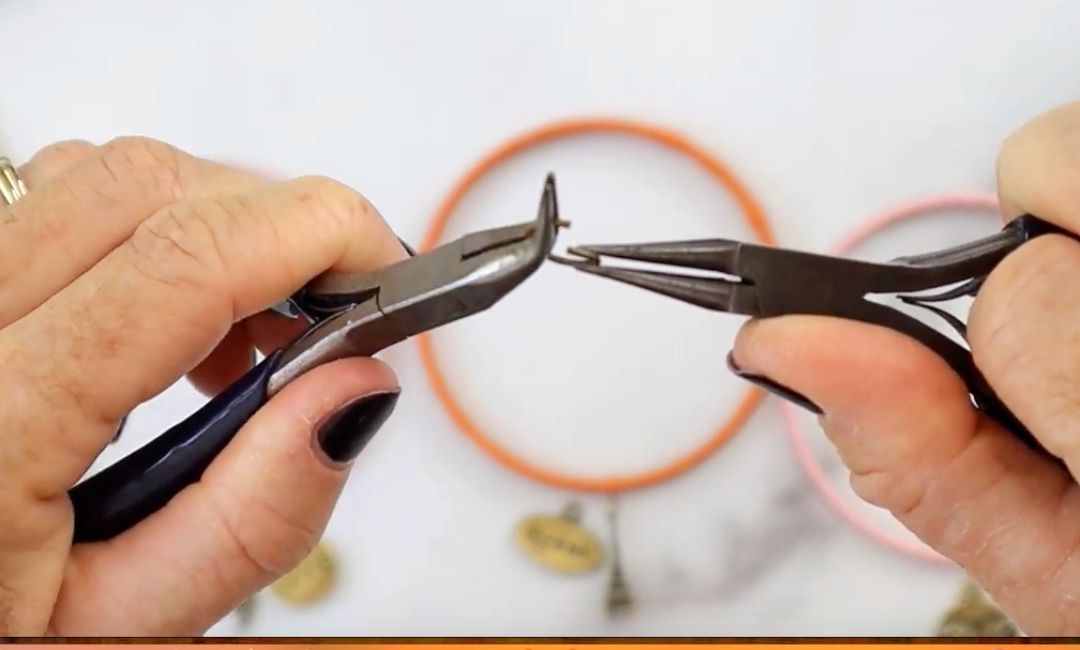
First, take your large jump ring and open it side to side. Using two pliers make this process much easier.
Now, choose your favorite charm and attach it with a jump ring.
I used large jump rings for this project so the charms would slide around the bracelet.
After adding a charm to your jump ring you can attach it to one of your DIY bracelets.
Be sure to close your jump ring side to side.
The video, below, shows you the jump ring technique if you need a little extra help, visually.
(just scroll to the bottom of the page to view video tutorial)
If you have any questions be sure to let me know in the comments.
This should be next on your list!!!
….a Personalized “Wire Name Necklace DIY,” which happens to be one of my most popular DIY YouTube videos with over 244K views!!! My hair was dark brown in this video…hee hee!
OR, maybe you need to make a stylish Jewelry Dish” to store your jewelry with a simple DIY.
(The jewelry dish is shown below.)

I hope you loved today’s DIY Bracelet project!
Be sure to “comment” and let me know what you thought of this project.
And definitely let me know if you tried making a set for yourself.
Below is the entire DIY Bracelet tutorial in Video format!
“Pin It” to your favorite board so you can reference this DIY later.
Super cute bracelets! I have all the supplies already! I’m excited to make my own.
Author
Thanks Lenny! Have fun making your bracelets!!!
Cute idea!
Author
Thanks Kendall!
Question…what kind of glue did you use to attach embroidery thread to the ring?
Author
Hi Conny:
I used E6000 Glue. Happy Holidays, Michele
Great idea!
Author
Thank you Sara! xo, Michele